That Sinking Feeling
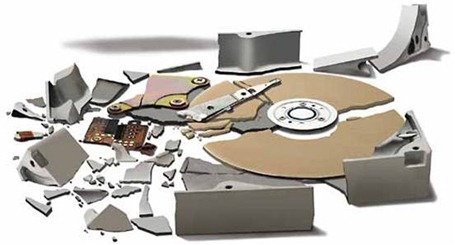
That’s the question I usually ask when confronted with a drive failure, or a malfunctioning system. More often than not, the answer is usually a no. Its a tough lesson to learn, and backup is such an easy thing to do these days. Just remember all hard drives will eventually fail. There should be no more excuses, having a backup is an essential part of daily life now, everything is kept on a computer these days right? Along with installing an anti virus program, there should be some sort of backup process happening.
So let’s talk about backup, what can you and should you be doing about this? Yes I know trying to perform and maintain this boring task is hard, but as they say an ounce of prevention yadda yadda. These days backup software is designed to do it for you and you won’t even notice it running. I can’t tell you how many times a good backup has saved the day, from accidentally deleting that file to restoring entire drives. As a general rule, you want to have a least 3 copies of every important file. One on the computer, one on an external drive, and another somewhere not near the physical location of the computer (ie in the “cloud”). I’ve experienced this first hand when my house flooded. There goes my computer..along with the backup drive sitting right next to it. Lucky for me I had a 3rd copy of everything important stashed elsewhere online and not in my home.
While there are several decent and affordable 3rd party software vendors out there that can do this job, I will focus on the ones that you already have installed and you probably didn’t know it comes with your OS. If you are a Windows Vista or Windows 7 user, Microsoft has included a built in Backup and Restore program, much improved over its XP predecessor. As for Apple users, it should be obvious that there is something called Time Machine begging for you to configure it if you have not already. To get started with either, please go and invest some money in an external drive that attaches via USB and get one that will be large enough to hold all your data off the internal system drive and any additional stored data on the computer you would like to backup.
Windows 7 Backup and Restore
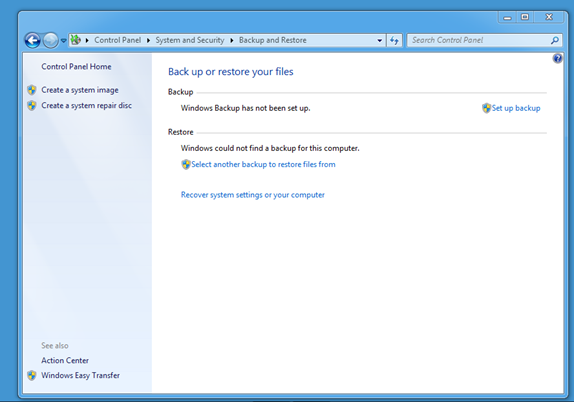
To get started using the built in backup software all you need is the external hard drive as I mentioned (or for the tech savvy a network file share on another system). There are two ways to invoke the Backup and Restore screen; one is to simply search under the start menu (the Windows bubble on the bottom left) for ‘backup’ and it should eventually bring up the listing above for Backup and Restore or click the long way and go to Start->Control Panel->System and Security->Backup and Restore.

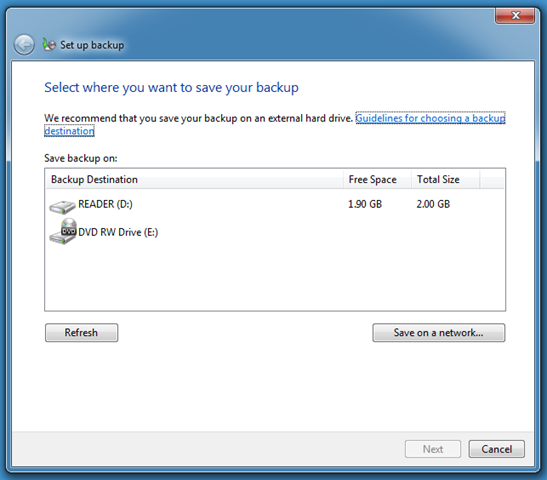
To follow the prompts to get an initial backup is quite simple. Click the “Set Up Backup” option and another dialog will open that looks like this screenshot:

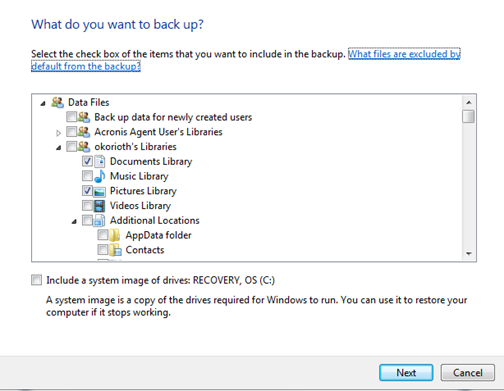
The first step is to choose the destination for where the data is to be stored, hopefully your external drive will be listed here. Or, for the advanced user one can choose a network share located somewhere else on the local network. Keep in mind the amount of data stored could be huge so it will take longer for the initial backup to complete. The next screen will ask you what data to backup, there are two options here. If you are not sure, you keep stuff locally in your profile folders (Documents, Photos, Music etc folders called Libraries) and you trust Microsoft to do it for you, choose the first option “Let Windows Choose”. This option also creates a system image and saves all installed programs as well. If you have additional data on another internal drive select the “Let Me Choose” option and on the next screen a layout of all your folders and drives is displayed. Make sure you check off all your user folder libraries, any other folders with data outside these and check the “Include a system image of drives: C:”

Clicking next will bring up a confirmation screen. Before clicking on finish however make sure you click on “Change Schedule” as by default it is set to run on Sundays at 7pm only. A backup is only as good as the last time it ran so once a week is not enough. I like to schedule mine for twice a week at a minimum and at a time when I know the computer will be turned on. Also note that if the backup window is missed, the program will run the next time the computer is on. Make the appropriate changes and save them. If this is the first time being setup the backup process will start. You with me so far? It may seem complex but really its not.
Next Steps
To make things even more easy for restoration purposes, Microsoft also provides a method of creating a System Repair Disc that ties into this backup system. If you machine has a fatal hard drive failure and cannot be brought back to life, simply boot off this CD/DVD and follow the prompts to restore the system onto a new drive. On the same screen for Backup and Restore off to the left is the option to create one with a CD/DVD burner. Make that and keep that in a handy location in case you ever need it.
Cloud Backup, The Third Copy

On top of running a local backup, I also recommend keeping a third copy of your data somewhere else that’s not local. You don’t have to keep absolutely everything out there, just the files, photos and other data that definitely should not get lost. For the paranoid, most services offer secure encryption so no one can get at this stuff without knowing your password. From the services I’ve seen, many have a scheduled backup option so again there is nothing to remember to do. A cursory Google search yields many options to go with from free to monthly costs, so read up on features and reviews accordingly. I personally use Crashplan Unlimited backup, which is easy to setup and runs in the background without hassle.


